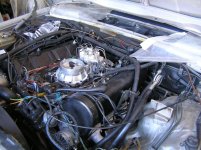
Valve Grind & De-coke on 6.9

More threads by Styria

WGB

New Member
Messages
1,289
Points
0
Location
Perth Western Australia
Yes - and Morris Oxford points could be set with the aluminised paper from your cigarette packet.

I still have my manometer and my colourtune - maybe I could set my idle mixture on my 6.9 with my colortune - I hadn't thought of that.


Bill
 

John S

New Member
Messages
636
Points
0
Location
Sydney
Styria tried using a Colortune sparkplug some time ago, but I don't think he had clear cut results with it.
 

abl567

Super Moderator
Moderator
Messages
2,170
Points
240
Location
Sydney
Hi Bill,
The Co2 meter I have was around the $270 mark on the net and has paid for itself 10 fold in fuel savings and time.
It is a cheapy machine, no brand name only Digital Exhaust Gas Analyzer on the cover.
It can be a bit of a hassle to use as you need to calibrate at 2% for 10 mins before use and I question its accuracy but it is close enough to establish a base line.
 
OP
Styria

Styria

The Godfather
Moderator
Messages
9,370
Points
492
Location
Sydney
....seeing that I still have my head under the bonnet...refitting heads, manifolds etc. etc. - some of my observations - at this stage, without photographic evidence.

You may recall that with Gleaming Beauty, Mercules was a HUGE help in refitting some of the major items, such as heads, exhaust manifolds etc. I was there just urging him on and listening to his occasional outburst of what I nowadays call 'yodelling' - it replaces the more commonly known word of swearing. Honest ! It sounds better and more convincing. So. with my Astral Silver 6.9, I'm getting good at 'yodelling' - no Mercules to help as he said quite politely 'no, thank you' and I don't blame him. What have I found that I can pass on ? A few things.

1) Just to confirm, no special tools are needed, not even for the headbolts that are located below the camshafts - you can get to them. Maybe not with all tools (extension bars and socketed Allen jeys), but if you have accumulated a good assortment of tools over the years, you should be right. In fact, my 6.9 workshop manual lists only three special tools, namely :

a) Socketed Allen key, 130mm long, 1/2 inch drive.
b) Socketed Allen key, 60mm long, 1/2 inch drive
c) Lever pusher for valve springs - you can do without.

Obviously, you need other tools as well, but the above and a combination of others will enable you to do the work.

2) I am lucky in that I have a friend with a spare 6.9 engine block who sets up the hydraulic valve static settings and also checks all hydraulic lifters to make sure that they operate correctly. He then returns the heads to me with the camshafts bolted up solid. You need to do that at some stage, but doing it beforehand certainly helps.

3) As I was not certain if I could still gain access to the head bolts located under the cams, I decided to remove the cams from the heads, taking care to mark the shims and rockers to be refitted to their original valves. I was now able to re-fit the heads without having to worry about valves hitting pistons etc. Also bear in mind that I had set the engine to TDC, and have not turned it at all since commencing dismantling. This setting was not to change, although I believe that by turning the engine about 30 degrees anti-clock wise, ALL pisons will be below TDC and you could fit the cams without fear of valves touching pistons. Incidentally, at TDC (in correct position), both No.1 and No. 6 pistons are at TDC. I also took photographs of both camshafts and their lobe positions to be able to refer to when the time came for reassembly. Invaluable - for assurance purposes. Some of these photos have already been posted in another thread.

4) Tried to fit right hand head with engine hoist - just about impossible - well it is,certainly not the way we tried it. BTW, exhaust manifold must not be attached to o/s head - there is no way you can fit refit that assembly as a single unit - it's difficult enough to slide in the manifold just on its own, even with all manifold retaining studs removed. Also, clearance between the rear of o/s head and firewall is absolutly minimal, even accounting for the fact that the master cylinder had been removed. One other thing - with the servo unit in place, the rearmost bearing and the outside LONG engine bolt must be attached to the head prior to putting it in place. You will not get it in afterwards - unless you remove the servo unit first. Just another job you can do without. I had also left the chainwheel attached to the chain ends, and even though I was able to remove the head with the wheel in situ, there was no way that we could replace it. Furthermore, in the end, we placed the head on the block without the engine hoist. Parks is pretty well muscled up these days, and he helped me with that task.

5) Next job - o/s exhaust manifold - I made a conscientious decision to do away with the studs, to be replaced by Allen headed high tensile bolts. Not easy. It just about becomes a toss-up between having the studs in place, or by the difficult access with two of the bolts holding the manifold to the head. I also decided to use Permatex gasket maker on the manifold gaskets, and boy, did I make a mess of the beautifully painted exhaust manifold. That black, gooey, sticky stuff....I hate it ! Also, those gaskets are, for the want of a better word, handed. They will only fit one proper way, but have alternate positions. You've got to get that right.

That's where it stands at the moment. Both cylinder heads have been torqued down properly (twice), and whilst the job is not particularly difficult (but not easy either), the last three rear headbolts can be a bit trying. Also, when refitting the camshafts, you MUST ensure that the lobes are in the CORRECT position - if they are not, you will bend valves once you start torquing down the head and camshaft bearing bolts. Regards Styria
 
Last edited:
OP
Styria

Styria

The Godfather
Moderator
Messages
9,370
Points
492
Location
Sydney
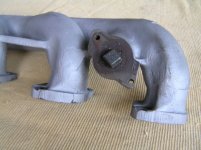
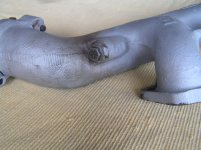
So, some observations for the near side head - in other words, cylinders No.5 to No. 8. Re-fitting this side is quite a bit easier than the other head. There really aren't any nasties. At this stage, I have not fitted the exhaust manifold for a couple of reasons - I wanted to modify it and that was a late decision. Australian complied cars have the EGC valve on the exhaust manifold, as well as a 'breather' fitting (for the want of a better description) that connects by plastic tube to another valve on the inner guard. Well, I have done away with both fittings on the exhaust manifold as they were not working anyway and would only have created difficulty in re-fitting the exhaust manifold.

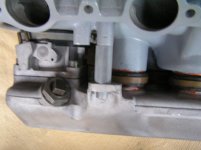
Additionally, the bottom chamber that is bolted to the inlet manifold had a very large and substantial pipe fitting that would snake its way towards the rear of the engine, and then snake its way back to the exhaust manifold. That opening has been plugged up as well and elimination of the piping should greatly ease the refitting of the inlet manifold. It's those types of fittings that can really create frustration and difficulty associated with the removal and replacement of the heads.

Also, looking at the fitment of the engine - it is quite fair to say that even the manufacture of the 6.9s shows evidence of design shortcomings, although nowhere near to that of the 6.3s. I am referring to the intake plenum chamber drain that is right at the back and hard up against the rocker cover on the o/s head. As I have said before, try and remove the rubber drain tube.

Another anomaly - on the left hand head. The foremost head bolt requires a fairly thick distance washer - for some reason, that bolt is too long and/or the thread in the engine block is not deep enough - perhaps for some good reason. On the other hand, one would have thought that MB could have used a shorter bolt. Very strange. Anyway, will keep providing further reports for those that may be interested. Regards Styria
 
Last edited:

TJ 450

New Member
Messages
357
Points
0
Location
Perth, WA, Australia
The EGR pipe on the 6.9 is exceedingly difficult to deal with. I found out the hard way, that gaskets are easily dislodged and distroyed by it.

Also, even though I have removed and refitted the intake manifold on my car three times, I still have not worked out how to deal with that pipe, other than removing it. The manifold drops straight in without the pipe, but with it, you have to attempt to hook it under the LH head. However, the design is such that it's simply almost impossible.

There is no mention of the EGR pipe in the engine manual either.

Regarding design shortcomings, I wonder if during the development of the W116, they actually intended on fitting the M100 right from the beginning. It actually seems almost too big for the chassis... but that's the joy of it.

These are some things that come to mind...
No heat shields on exhaust manifolds, EGR pipe design, P/S reservoir location and transmission dipstick tube location with early brake reservoir.

The 6.9 is however, the most beautiful compromise I have encountered.

In contrast, the M117 is practically "made" for the 116 chassis. The only fault I can think of is the #3 and #4 spark plug locations. It was also intended for high production numbers too.

As for the head bolt, early versions don't have the spacer. I suspect that the reason why mine doesn't have it, is that the later 1977 cylinder heads were retrofitted for ADR compliance and someone forgot to install it.

Tim
 

s class

New Member
Messages
788
Points
0
Location
South Africa
the 6.9 sure doesn't seem all that well thought out. Remember the LHD version is by far the more numerous, and therefore the version most design effort would have been focussed on. The front levelling valve is on the opposite side to that on RHD cars - so there are like 4 or 5 lines coming from the reservoir / PR area, under the radiator, up under the battery, then up over the right inner fender, and then down to the level valve location. It just does not strike one as having been envisioned during the original design process of the W116 chassis. Having said that, I think the 6.9 is probably the easiest variant of the 116 to work on - accessibility is surprisingly good, and the suspension is really simple to sort out once you get the hang of it.
 
OP
Styria

Styria

The Godfather
Moderator
Messages
9,370
Points
492
Location
Sydney
Well TJ450, welcome to the world of frustration and innovation. I wasn't particularly impressed with the design of all that pipework, nor was I looking forward to re-fitting the inlet manifold with that pipe snaking its way all over the place. So, here is part of that innovation, or call it solution.

ChrisPearsonAstralSilver69046.jpg

The rear section of the exhaust manifold had that silly little pipe connected to the valve by that plastic tube - thankfully, that's also gone now...


ChrisPearsonAstralSilver69047.jpg

...and that is the fitting on the lower part of the Inlet manifold - again thankfully, that's been plugged up never to be used again. Not only that, but the pipe that extended to the inside of that chamber, would have interferred with smooth combustion.

ChrisPearsonAstralSilver69048.jpg

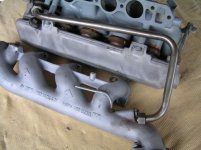
Last but not least, there is the picture of THAT pipe - whilst a total obstruction with the standard set-up, I will find use for it - when the time comes to modify the heater hoses on the firewall as I don't fancy paying the sort of prices that MB want for those 'puppies' - in the region of $90.00 each. Don't worry, in the past, I have tried to buy those from Autohaus AZ - they obviously don't know them as on two occasions they sent me 107 items.


ChrisPearsonAstralSilver69049.jpg

Regarding the heat shields as on the 117 engine. I can comfortably do without them - on the 450, they only render removal of spark plugs more difficult than what it should be. Although having said that, a magnetic spark plug socket, or the special Hazet socket that is, or should be, part of the 6.3 tool kit, greatly help in easing the nuisance R&R factor of Nos. 3 & 4 plugs.

I don't have an answer for that odd head bolt, and I do think that the 6.9 was a little bit of an afterthought - no, that's not right - they just did not seem to have the werewithall to change the firewall. Regards Styria
 
Last edited:
OP
Styria

Styria

The Godfather
Moderator
Messages
9,370
Points
492
Location
Sydney
the 6.9 sure doesn't seem all that well thought out. Remember the LHD version is by far the more numerous, and therefore the version most design effort would have been focussed on. The front levelling valve is on the opposite side to that on RHD cars - so there are like 4 or 5 lines coming from the reservoir / PR area, under the radiator, up under the battery, then up over the right inner fender, and then down to the level valve location. It just does not strike one as having been envisioned during the original design process of the W116 chassis. Having said that, I think the 6.9 is probably the easiest variant of the 116 to work on - accessibility is surprisingly good, and the suspension is really simple to sort out once you get the hang of it.

Hi S - Class, I guess there just wasn't enought room on the right inner guard to have the engine oil reservoir, as well as the hydraulic reservoir, battery as well as the windscreen washer bottle. Pretty crowded, isn't it ? Luckily enough, none of the hydraulic components are prone to rusting, and they are well hidden (especially the piping) which prevents them from being damaged physically. I agree with you that, generally, 6.9s are no harder to work on than some of the other 116 models. Regards Styria

BTW, do your cars have those emission pipe fittings on the Inlet and Exhaust manifolds as I have illustrated in one of my previous posts ?
 

TJ 450

New Member
Messages
357
Points
0
Location
Perth, WA, Australia
As long as you're not removing engines and gearboxes, the 6.9 is indeed great to work on.
I also think that the suspension is friendly to work on... I hate dealing with springs. It actually seems almost too easy.

Tim
 
OP
Styria

Styria

The Godfather
Moderator
Messages
9,370
Points
492
Location
Sydney
Hi TJ450, you're basically confirming what I have been saying for years - I'd rather work on a 6.9 anytime. Suspension yes, routine maintenance yes (plugs etc.) and the rest is no more difficult than 450s as a rule.

Regarding removal of box, I believe that you may have removed it from your car, but left the torque converter attached to the drive plate. I don't quite recall, but if you did, that's obviously a huge no no. It's so easy to damage the drive plate or the tongs of the torque converter, not to mention the pump seal and pump bush. Today I also refitted the n/s exhaust manifold (what a blessing not to have that pipe to contend with), plus the inlet manifold. I used plenty of Loctite anti seize compond, particularly for the bolts that are in contact with the cooling system. I had also purchased new hi-tensile Allen headed bolts for the manifold. Regards Styria
 

s class

New Member
Messages
788
Points
0
Location
South Africa
Styria, both of my cars are euros and lack that EGR stuff.
 
OP
Styria

Styria

The Godfather
Moderator
Messages
9,370
Points
492
Location
Sydney
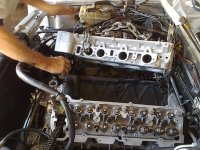
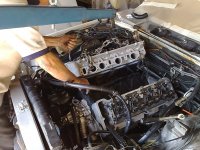
Thanks to Parks for putting in the pictures - those were taken last week, and I can tell you that we dispensed with the idea of refitting the o/s head with the help of the engine hoist. We just couldn't get the angle right and finished up fitting it by lifting it on.

Just to get back to that EGR pipe that runs from the bottom of the inlet manifold via the back of the head onto the top towards the rear of the exhaust manifold and where it then meets up with another pipe that connects to another valve at the front of the manifold. I am still scratching my head at this arrangement. Obviously, I had disconnected all the piping on top of the manifold, and the pipe leading to the inlet manifold was removed as one unit. Even on the bench, dismantling that piping proved to be quite unwieldy and it just did not want to let go at the large nut fitting. Once the position of that pipe is disturbed, you'd have the dickens of a chance of lining it up again - it'd be almost impossible. Another pipe to consider, of course, is the water pipe that leads from the top of the water pump to the back of the engine block and meets up with the rubber hose from the heater. That pipe has to be fitted first before the two halves of the inlet manifold ban be bolted back together.

All in all, it's one of those jobs that will make you think. Regards Styria
 

TJ 450

New Member
Messages
357
Points
0
Location
Perth, WA, Australia
Hi TJ450, you're basically confirming what I have been saying for years - I'd rather work on a 6.9 anytime. Suspension yes, routine maintenance yes (plugs etc.) and the rest is no more difficult than 450s as a rule.
Having worked on both, side-by-side, I'd say that's pretty well spot on.

Regarding removal of box, I believe that you may have removed it from your car, but left the torque converter attached to the drive plate. I don't quite recall, but if you did, that's obviously a huge no no. It's so easy to damage the drive plate or the tongs of the torque converter, not to mention the pump seal and pump bush.
The torque converter was actually separated from the drive plate and removed with the box as it should have been, but it was pretty hard to remove the spigot from the crankshaft. Some jimmying was required.

Due to clearance issues, the bellhousing had to be removed in-situ, under the car... that was when things became interesting. I conclude that if the transmission must be removed with the engine in-situ, the car needs to be on a hoist to make it feasible. Otherwise, the engine out method is the safest alternative.

Today I also refitted the n/s exhaust manifold (what a blessing not to have that pipe to contend with), plus the inlet manifold. I used plenty of Loctite anti seize compond, particularly for the bolts that are in contact with the cooling system. I had also purchased new hi-tensile Allen headed bolts for the manifold. Regards Styria
Excellent... that's the way to go. ;)

Tim
 
OP
Styria

Styria

The Godfather
Moderator
Messages
9,370
Points
492
Location
Sydney
Thanks TJ450. Just tell me this - from what I can recall, you have refitted the inlet manifold a second time. Do you still have all that piping in place. If you do, tell me how easy (!) or difficult it was to line everything up. Regards Styria
 

TJ 450

New Member
Messages
357
Points
0
Location
Perth, WA, Australia
All the piping is indeed still in place. Getting everything to line up would have been good, but it never did line up in the first place, as the pipe was touching the spacer tubes between the manifold halves already and even then there was still an extra few millimetres required to clear the LH cylinder head.

I resorted to belting the pipe with a hammer to flatten it out slightly (cringing while doing so) in the interfering areas, but even then it still clipped the edge of the gaskets (not causing damage, although it did the previous time, hence the leak).

In the end, I actually removed both gaskets. I then lowered the manifold in and moved the unit back towards the firewall and worked it in, manipulating the position of the pipe and it finally let go. I then had an assistant (my Brother) slide the gaskets in from the front on either side and into position.

After that, I installed the new bolts from Coventry's Fasteners and torqued them down in steps to 25nm and used non-metallic anti-seize compound. It was then just a matter of tightening the nut on the pipe-to-plenum fitting and fitting the throttle housing.

I guess I'll find out in due course as to the effectiveness of that ordeal, nut I'm pretty confident that it will be OK.

Tim
 
OP
Styria

Styria

The Godfather
Moderator
Messages
9,370
Points
492
Location
Sydney
Hi TJ450, that, indeed, is a great effort - I dips my hat to you. Even removing those little puppies is hard enough. Putting them back - yuk. Regards Styria
 
OP
Styria

Styria

The Godfather
Moderator
Messages
9,370
Points
492
Location
Sydney
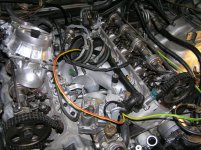
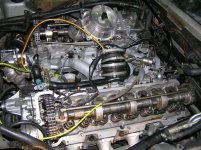
Just an update with a few pics to illustrate and demonstrate any number of things, but primarily cleanliness and all the paraphernalia that needs to be refitted.

ChrisPearsonAstralSilver69050-1.jpg

ChrisPearsonAstralSilver69051-1.jpg

ChrisPearsonAstralSilver69054.jpg


These pics were taken some little while ago. I am pleased to convey that I have struck no 'after-assembly' problems and the engine is running quite sweetly with much better pick up from low than before all this work was done.

As is my wont, I thoroughly cleaned out the small sump and the oil reservoir several times with high pressure kerosene and, of course, prior to that, I was able to thoroughly wash out the water jackets in the block as I had removed the housing that's located between the water pump and engine block.

Paintwork turned out excellent. I am pleased to convey that no 'slicing' nor buffing has been required and orange peel has been kept to a bare minimum. Pics to follow in due course. Presently coming to grips (fixing) the central locking system. Regards Styria
 
Similar threads
Thread starter Title Forum Replies Date
M Mercedes 6.9 suspension valve Technical Information 2
S Transmission - Valve Body Mechanicals 4
S Mercedes 6.9 Transmission Modulator Valve Mechanicals 6
Patrick_R Variable valve duration technology Technical Information 3
S Turbo Boost Valve Technical Information 10
Oversize Valve Sizes Technical Information 4
D Noise from valve train - 6.9 Mechanicals 0
Oversize Custom throttle and SLS valve linkages Mechanicals 1
Styria Valve Body - Ch.116 6.9 Technical Information 4
S valve stem seals 110 DOHC 6 Mercedes R/C107 4
S aux air valve Mercedes R/C107 3
S Aux air valve Mercedes R/C107 3
L Front Suspension Valve Parts Mechanicals 28
motec 6.9 SLS Valve on ebay UK Gumtree/eBay/Facebook Listings 1
Oversize 6.9 control valve for sale Gumtree/eBay/Facebook Listings 3
S aux air valve Mercedes R/C107 6
WGB LH Sway Bar chassis mount and levelling valve in RHD 6.9 Technical Information 2
Tony66_au Aux Air Valve refurb ( AAV ) Technical Information 12
T valve stem guide seals Mercedes R/C107 5
Styria Valve Body Removal Technical Information 2
Styria 6.9 front suspension valve replacement Mercedes W116 12
A Auto tranny modulator valve Mercedes W116 7
Styria Removal - 6.9 rear suspension valve Mechanicals 0
G Any trick to replacing heater valve? Mercedes W116 5
WGB Valve spring compressors M100 and M116/7 motors. Mechanicals 7
abl567 Blocked TX Valve Mechanicals 9
WGB Initial setting of hydraulic valve train Mechanicals 0
G Valve stem seals on M110 2.8 Mechanicals 2
s class How NOT to correct your 6.9 valve timing Mechanicals 4
s class 6.9 valve timing sorted out Mechanicals 36
J Aux Air Valve Mechanicals 2

Similar threads

Top