WGB
New Member
This relatively simple procedure is fraught with problems as it involves potentially moving the pinion position and causing my nice quiet diff to become a howler.
I would have preferred to leave well alone but as it had a weep it could not be ignored.
The manual calls for initial measurement of pinion bearing preload followed by replacement of the pinion nut with a newer type of nut but I have stuck with the original old nut for a number of reasons which I will attempt to explain.
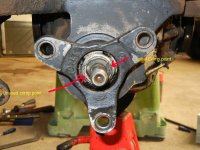
Here is a view of the slotted pinion nut with it's locking point peened into an eccentric in the shaft. You will notice there is another unused eccentric on the opposite side of the pinion shaft with a pristine piece of nut adjacent to it.
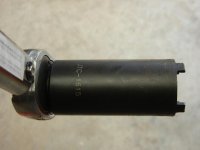
Here is a picture of the socket required for this style of slotted nut.
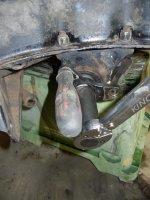
I cobbled up a pinion pre-load measuring device using a 1/4 inch torque wrench but essentially the preload was zero so it was not a lot of use.
On advice from Koan that the nut should be replaced back in it's initial position and advice from S class that there are two locking points I decided to re-use the old nut and use the old locking point as a marker and the opposite side of the shaft to actually lock it.
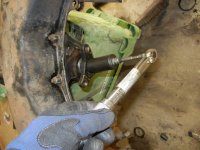
The nut must first be loosened and to do this the pinion must be locked from turning. The manual calls for another special tool but I am very over special tools and a large phillips head screwdriver inserted through one hole in the flange will lock it quite successfully. This photo shows the screwdriver in position for tightening the pinion nut - opposite side is used to unscrew it obviously.
Once the pinion nut is unscrewed and removed the yoke can then be tapped gently from behind to remove it from it's splines and then the seal is exposed. This must then be prised out with a screwdriver and a new seal is lubricated and tapped into position.
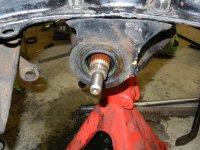
Here is a picture of the old seal before removal.
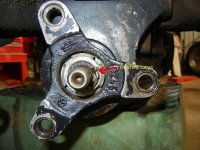
Because I was re-using the old nut it was easy to return it to it's original position but the torque required to get there was very low so I torqued it to the recommended 180Nm and here is a picture of the final position showing the nut has been turned 3 or 4 mm further than it's original position.
I could find no perceptible change in pre-load torque on turning the pinion so now we will have to wait and see what it sounds like.
Bill
I would have preferred to leave well alone but as it had a weep it could not be ignored.
The manual calls for initial measurement of pinion bearing preload followed by replacement of the pinion nut with a newer type of nut but I have stuck with the original old nut for a number of reasons which I will attempt to explain.
Here is a view of the slotted pinion nut with it's locking point peened into an eccentric in the shaft. You will notice there is another unused eccentric on the opposite side of the pinion shaft with a pristine piece of nut adjacent to it.

Here is a picture of the socket required for this style of slotted nut.

I cobbled up a pinion pre-load measuring device using a 1/4 inch torque wrench but essentially the preload was zero so it was not a lot of use.

On advice from Koan that the nut should be replaced back in it's initial position and advice from S class that there are two locking points I decided to re-use the old nut and use the old locking point as a marker and the opposite side of the shaft to actually lock it.
The nut must first be loosened and to do this the pinion must be locked from turning. The manual calls for another special tool but I am very over special tools and a large phillips head screwdriver inserted through one hole in the flange will lock it quite successfully. This photo shows the screwdriver in position for tightening the pinion nut - opposite side is used to unscrew it obviously.

Once the pinion nut is unscrewed and removed the yoke can then be tapped gently from behind to remove it from it's splines and then the seal is exposed. This must then be prised out with a screwdriver and a new seal is lubricated and tapped into position.
Here is a picture of the old seal before removal.

Because I was re-using the old nut it was easy to return it to it's original position but the torque required to get there was very low so I torqued it to the recommended 180Nm and here is a picture of the final position showing the nut has been turned 3 or 4 mm further than it's original position.

I could find no perceptible change in pre-load torque on turning the pinion so now we will have to wait and see what it sounds like.
Bill
