WGB
New Member
Preamble - When first posted this pictorial caused some confusion so here are two links which show the lead up to the rationale and cost of this conversion
Parts Costings
Parts Arrival
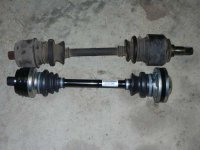
The 6.9 driveshafts are not satisfactorily repairable and most second hand replacements are probably more dubious than what is on my car so after some problems I decided to change the car to later model 126 560SEL drive shafts which are quite reasonably priced new but require the diff to be converted to later style flanges instead of the splined driveshaft end.
Here is a picture of old and new style drive shafts.
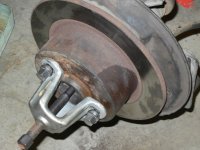
First the bolt in the hub must be removed and the drivshaft spline loosened in the hub.
I have used a hub puller but a few gentle taps with something long and skinny would probably suffice.
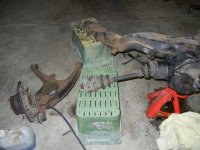
Having done this job on the car before the sheer luxury of only having to undo the diagonal arm bush bolts and pulling it all apart is unimaginable.
My rear diff cover has been off in recorded history but after loosening the bolts there are a few cutouts where judicious use of soft faced hammer will spring the alloy casting off easily.
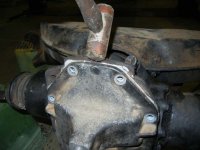
The internal driveshaft locking clip then must be removed and preferably replaced with a new one when re-assembled (I think they were less than $2 each at the Classic Centre).
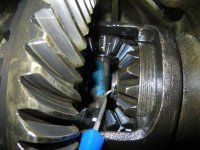
Here is the new flange with it's spacer washer sitting loosely on the shaft. The washer must be re-used or replaced when the flanges (or a new driveshaft for that matter ). There are 6 different sizes and using a micrometer on mine showed they were 2.6 mm each and after assembling the diff there was some movement so I will ordering a 2.9 and a 3mm spacer tomorrow before I can complete the job.
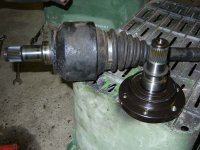
The old radial output output seals wre removed and replaced. They are not particularly easy to remove and I had to use a Jemmy Bar to get them out. From past experience you have to be careful in replacing them as you can push them in too far as there is no internal ridge to stop them going all the way into the diff. They only need to be seated with the outer face level with the bottom of the chamfer in the housing as shown in the photo below.
Use plenty of diff oil inside and ouside so that the new seal slips in a little more eaily and then doesn't run dry when the flange is put in.
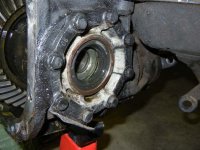
All put together with new clips
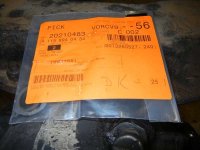
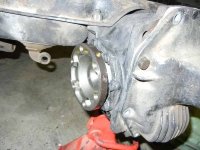
Left hand side flange
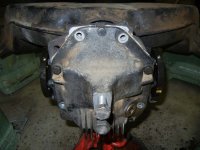
New look diff
Bill
Parts Costings
Parts Arrival
The 6.9 driveshafts are not satisfactorily repairable and most second hand replacements are probably more dubious than what is on my car so after some problems I decided to change the car to later model 126 560SEL drive shafts which are quite reasonably priced new but require the diff to be converted to later style flanges instead of the splined driveshaft end.
Here is a picture of old and new style drive shafts.

First the bolt in the hub must be removed and the drivshaft spline loosened in the hub.
I have used a hub puller but a few gentle taps with something long and skinny would probably suffice.

Having done this job on the car before the sheer luxury of only having to undo the diagonal arm bush bolts and pulling it all apart is unimaginable.

My rear diff cover has been off in recorded history but after loosening the bolts there are a few cutouts where judicious use of soft faced hammer will spring the alloy casting off easily.

The internal driveshaft locking clip then must be removed and preferably replaced with a new one when re-assembled (I think they were less than $2 each at the Classic Centre).

Here is the new flange with it's spacer washer sitting loosely on the shaft. The washer must be re-used or replaced when the flanges (or a new driveshaft for that matter ). There are 6 different sizes and using a micrometer on mine showed they were 2.6 mm each and after assembling the diff there was some movement so I will ordering a 2.9 and a 3mm spacer tomorrow before I can complete the job.

The old radial output output seals wre removed and replaced. They are not particularly easy to remove and I had to use a Jemmy Bar to get them out. From past experience you have to be careful in replacing them as you can push them in too far as there is no internal ridge to stop them going all the way into the diff. They only need to be seated with the outer face level with the bottom of the chamfer in the housing as shown in the photo below.
Use plenty of diff oil inside and ouside so that the new seal slips in a little more eaily and then doesn't run dry when the flange is put in.

All put together with new clips

Left hand side flange

New look diff

Bill
Last edited:
