WGB
New Member
My rear screen has suffered from the usual 116 laminated screen delamination since I purchased it and it was one of those "must do sometime" jobs.
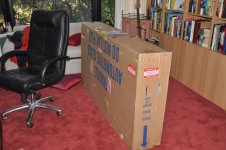
So courtesy of Tom Hansen at the Classic Centre Irvine a brand new screen (correct part number) duly arrived as previously posted - the hardest part was transporting it from my Surgery to home where it has sat in my study for several weeks attracting scorn and derision from "She who must be obeyed".
The rear reclining seat in my car is not easy to remove for one person so when my brother-in-law arrived for the New Year weekend he was press-ganged into assisting.
The chrome trim was removed - starting with the horizontal bottom piece and then followed by the two upper halfs - the lower trailing edge piece puls directly backwards and the side pices at right angles to the opening
The rear seat, upper rear headliner trim (sfter removing rear light) and both rear side C pillars panels were removed by puling directly forwards.
The interior trim at the base of the rear window is removed by releasing the blue plastic nuts in the boot under the parcel shelf - my 450 had four nuts but this car has a nut at either end and two bent metal clips in teh central position.
The rear Hand grips were removed, reading lights removed and then using a small hook the clip can be disengaged through the reading light aperture on each side and the side panels left loose around the rear window rubber.
The wiring on each side needs to be inbolted on the RH side (earthing point) and unplugged on the LH side (power supply)
Using a trim wedge we released the rubber lip on the top LH corner and putting constant force by the one on the inside and holding from outside the window comes out quite easily so long as the correct non-setting sealant has been used.
This leaves the lip covered in the old goo
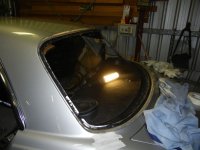
and if you are lucky and have a relatively rust free car once the old goo is cleaned off with Kerosene you have a nice clean lip to apply the new window
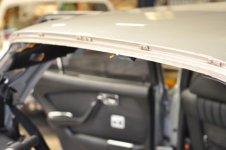
You can also clearly see the trim clips that hold the chrome trim in place and the angle they face to allow removal with plastic wedge.
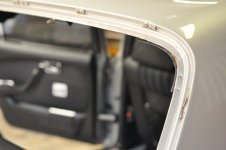
The clean opening is then attacked with fresh non-setting sealant
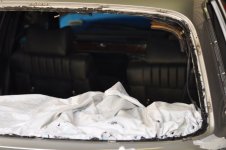
While at the same time the rubber is fitted to the glass with the channel prefilled with a lavish supply of non-setting sealant.
Holes need to be cut if a new rubber is fitted to allow the wires to pass through the rubber and the plastic insulation piece will need to be transferred over to the power wire which only comes supplied with the metal electrode .
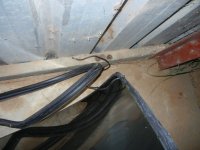
After the seal is fitted a piece of nylon rope is fitted into the fitting lip - I used 3.5mm x 10m nylon rope which was lubricated with a wax candle.
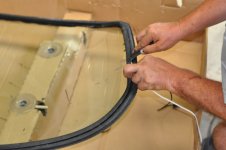
The rope is wrapped completely around the channel and the ends overlapped in the centre of the bottom edge.
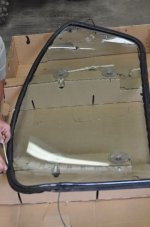
The window is then lifted and placed in the opening with as much of the bottom edge already fed into the aperture as possible - I have a pair of vacuum glass lifts but they are not really necessary if two people are doing the job.
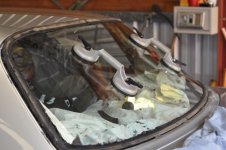
With one persion pushing from the ouside and the other pulling on the string inside (being careful not to tear the soft rubber) the window magically seats itself relatively easily.
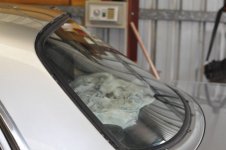
And another view with most of the excess gunk removed with kerosene and before the chrome is returned
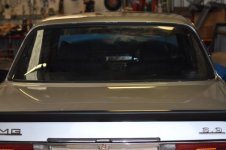
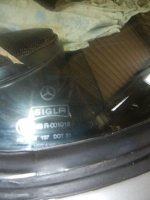
It still needs to go off for it's tint film to be applied but here is a final pic so that TJ450 believes it really is a genuine M-B Sigla screen and at a surprisingly realistic cost.
Bill

So courtesy of Tom Hansen at the Classic Centre Irvine a brand new screen (correct part number) duly arrived as previously posted - the hardest part was transporting it from my Surgery to home where it has sat in my study for several weeks attracting scorn and derision from "She who must be obeyed".

The rear reclining seat in my car is not easy to remove for one person so when my brother-in-law arrived for the New Year weekend he was press-ganged into assisting.
The chrome trim was removed - starting with the horizontal bottom piece and then followed by the two upper halfs - the lower trailing edge piece puls directly backwards and the side pices at right angles to the opening
The rear seat, upper rear headliner trim (sfter removing rear light) and both rear side C pillars panels were removed by puling directly forwards.
The interior trim at the base of the rear window is removed by releasing the blue plastic nuts in the boot under the parcel shelf - my 450 had four nuts but this car has a nut at either end and two bent metal clips in teh central position.
The rear Hand grips were removed, reading lights removed and then using a small hook the clip can be disengaged through the reading light aperture on each side and the side panels left loose around the rear window rubber.
The wiring on each side needs to be inbolted on the RH side (earthing point) and unplugged on the LH side (power supply)
Using a trim wedge we released the rubber lip on the top LH corner and putting constant force by the one on the inside and holding from outside the window comes out quite easily so long as the correct non-setting sealant has been used.
This leaves the lip covered in the old goo

and if you are lucky and have a relatively rust free car once the old goo is cleaned off with Kerosene you have a nice clean lip to apply the new window

You can also clearly see the trim clips that hold the chrome trim in place and the angle they face to allow removal with plastic wedge.

The clean opening is then attacked with fresh non-setting sealant

While at the same time the rubber is fitted to the glass with the channel prefilled with a lavish supply of non-setting sealant.
Holes need to be cut if a new rubber is fitted to allow the wires to pass through the rubber and the plastic insulation piece will need to be transferred over to the power wire which only comes supplied with the metal electrode .

After the seal is fitted a piece of nylon rope is fitted into the fitting lip - I used 3.5mm x 10m nylon rope which was lubricated with a wax candle.

The rope is wrapped completely around the channel and the ends overlapped in the centre of the bottom edge.

The window is then lifted and placed in the opening with as much of the bottom edge already fed into the aperture as possible - I have a pair of vacuum glass lifts but they are not really necessary if two people are doing the job.

With one persion pushing from the ouside and the other pulling on the string inside (being careful not to tear the soft rubber) the window magically seats itself relatively easily.

And another view with most of the excess gunk removed with kerosene and before the chrome is returned

It still needs to go off for it's tint film to be applied but here is a final pic so that TJ450 believes it really is a genuine M-B Sigla screen and at a surprisingly realistic cost.

Bill
