WGB
New Member
All you experienced guys look the other way (criticism of course always welcome) but it might help someone to get started in meaningfully working on their own 116.
Start with the steering wheel at the central position - hopefully your steering is centralised - If not here is another posting to give you a starting point but if at the end of it your wheel is not central you will need a wheel alignment to get it right.
http://www.topklasse.org/forums/showthread.php?t=2012&highlight=centralisation
1. Remove the emblem from the centre of the steering wheel with a small hook or screwdriver taking care not to split the pad
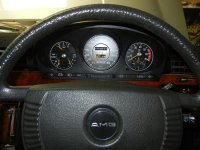
2. If you are replacing the wheel in the same position mark the position of the shaft and the wheel and then using a 27mm socket (big spline post 1978 wheel) and medium extension unscrew the nut while holding the wheel securely and not using the steering lock
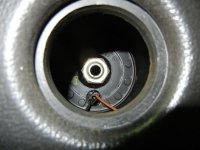
3. At this stage I protect the woodwork with masking tape
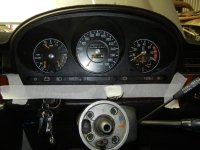
4. Mercedes make a special tool for pulling friction fit clusters but I have never seen a 116 cluster that couldn't be pulled backwards with finger pressure.
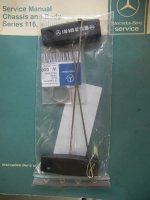
5. The cluster is pulled just far enough to get a hand behing the back and unscrew the speedo cable - take care as sometimes loose edges of the dashboard "skin" may come with the instrument and damage your dash.
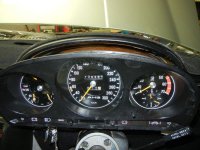
6. This then gives enough slack for the cluster to be turned at right angles
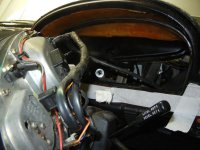
7. At this point the wiring can be unclipped and the oil pressure gauge connection unscrewed with a 10mm spanner.
Warning - While the cluster is out do not lean on the empty dashboard binnacle or you will crack your dash and do not start your engine unless you want to lubricate your interior.
This is the back of a 6.9 Euro cluster with the connection points labelled - I believe a US 6.9 uses the extra hole for the seatbelt reminder.
Models with less equipment will just have a couple of connections fewer,
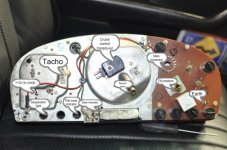
Here is my cluster rewired for re-fitment with my usual mistake which is to put the suspension light in the brake wear hole and vice versa - for some reason the speedo cable was more difficult than normal to refit and by the time I had checked it I didn't have the heart to remove the speedo cable and re-take the photo.
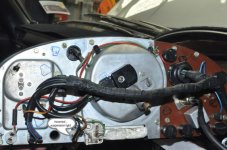
On re-fitment make sure you have a good rubber sealing washer and keep all extraneous wiring from getting in the way of the seal but even then it does not sit as well as later designs.
Bill
Start with the steering wheel at the central position - hopefully your steering is centralised - If not here is another posting to give you a starting point but if at the end of it your wheel is not central you will need a wheel alignment to get it right.
http://www.topklasse.org/forums/showthread.php?t=2012&highlight=centralisation
1. Remove the emblem from the centre of the steering wheel with a small hook or screwdriver taking care not to split the pad

2. If you are replacing the wheel in the same position mark the position of the shaft and the wheel and then using a 27mm socket (big spline post 1978 wheel) and medium extension unscrew the nut while holding the wheel securely and not using the steering lock

3. At this stage I protect the woodwork with masking tape

4. Mercedes make a special tool for pulling friction fit clusters but I have never seen a 116 cluster that couldn't be pulled backwards with finger pressure.

5. The cluster is pulled just far enough to get a hand behing the back and unscrew the speedo cable - take care as sometimes loose edges of the dashboard "skin" may come with the instrument and damage your dash.

6. This then gives enough slack for the cluster to be turned at right angles

7. At this point the wiring can be unclipped and the oil pressure gauge connection unscrewed with a 10mm spanner.
Warning - While the cluster is out do not lean on the empty dashboard binnacle or you will crack your dash and do not start your engine unless you want to lubricate your interior.
This is the back of a 6.9 Euro cluster with the connection points labelled - I believe a US 6.9 uses the extra hole for the seatbelt reminder.
Models with less equipment will just have a couple of connections fewer,

Here is my cluster rewired for re-fitment with my usual mistake which is to put the suspension light in the brake wear hole and vice versa - for some reason the speedo cable was more difficult than normal to refit and by the time I had checked it I didn't have the heart to remove the speedo cable and re-take the photo.

On re-fitment make sure you have a good rubber sealing washer and keep all extraneous wiring from getting in the way of the seal but even then it does not sit as well as later designs.
Bill
Last edited:
