Frustration of december 2008

More threads by Michel

Michel

The Prince of Arabia
Moderator
Messages
10,023
Points
775
Location
Sydney, Australia
One of my friends is in a bit of pickle
He is asking how to get to the split pin that connects the hand brake cable near the accelerator pedal :mad:
 

Styria

The Godfather
Moderator
Messages
9,391
Points
622
Location
Sydney
It's nice to know that Michel considers yours truly as one of his friends ! I'll take it anytime though.

This was a thread that was the germination of several hours of frustrated attempts to remove a split pin, first of all in the boiling heat (34 degrees) and then the following morning, on my 450 that's been parked in my back yard for about three to four years.

It all started when I bought this 450SE for the upholstery that was to go into a 6.9. So, the interior was stripped and I was going dismantle the rest until I started digging into things and found almost complete service and maintenance record, original sales document etc. etc. This car needed saving.

As can happen quite easily, and it has to me over the years, subletting some work to others can turn into nightmares and this was such an occasion. The car had a small amount of rust under the accelerator pedal, and I knew this panel beater who was exceptionally gifted with some of the work he had done for me. So I asked him to repair the rust, which was duly carried out.

It wasn't until sometime much later (say about two years) that I discovered that the handbrake cable had been disconnected, but I did not know why and where until last week - right behind the accelerator pedal ! I started having a closer look as I needed to get the handbrake to work as the car will be for sale when I have complewted the re-installation of the interior. It didn't take long to realize why the guy had never re-connected the cable - one just couldn't do it.

The head of this very stiff cable feeds through an abutment bracket at virtually right angles, and you have to physically pull through the INNER cable to try and attache the nipple head of the cable to a floating bracket that is attached to the bottom of the handbrake lever by means of a FLUSH fitting clevis pin and split pin. Holding the inner cable clear of the outer one proved impossible on account of space restrictions and it became a necessity to remove both the split and clevis pins. That split pin that had to come out, before I could remove the clevis pin and attach the flexible bracket to the head nipple of the cable ! This was just absolute frustration - right in the front corner behind the accelerator pedal and the job took about six hours, as well as a 45 kilometer return trip just to get a special pair of pliers - one could say that I should have had them in the first place, but you do start on a job not always knowing what tools are required. Anyway,, it's all done now, but I don't ever really want to do this sort of a job again.

You have to ask yourselfthough why the guy should have disconnected the cable in the first place. I suspect chances were that he would not have been aware of the degree of difficulty involved in re-attaching it. If the clevis pin had been fitted the other way round, those difficulties would never have arisen. A sad, boring and frustrating tale. Regards Styria
 
Last edited:

Styria

The Godfather
Moderator
Messages
9,391
Points
622
Location
Sydney
Anyway, that's not quite the end of it. Whilst the guy was a pretty good panel beater, he really did lack the finer points of doing things correctly. Is so turns out now that he welded the metal tag that locates the bottom of the accelerator pedal is too far back and will have to be re-positioned.

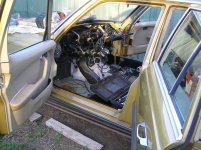
This 450SE will be for sale in due course. Over the Christmas/New Year period, I have endeavoured to spend some of my spare time and started to refurbish the interior of the car.

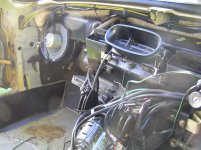
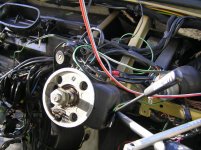
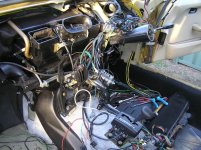
Unfortunately, it meant replacement of the dash pad, and no matter how often you do it, it never seems to fall to hand all that easily....

ebaypictures-December2008142.jpg

ebaypictures-December2008141.jpg

ebaypictures-December2008144.jpg

There always seem to be wires everywhere, and really one has to manhandle the dash in order to effect removal/replacement.

It is a fallacy to try and remove/refit the pad by lifting/starting upwards. That only makes it more difficult as most clearance is at the bottom of the screen. It is always best to leave the glovebox area till last - in other words, position the dash side as best as possible and then push the other side towards the screen - do not lift.

Two things to look out for - the far right hand side corner which is inclined to become disshaped against the 'A' pillar, but Inox and a special tool we have enables one to tuck that corner into place. It is also important to tuck the front part of the dash below the bottom of the windscreen rubber. Once it's all in place, it is amazing what a neat fit the dash really is - very satisfying to be pushing and tugging in any direction and it's all quite flexible.


ebaypictures-December2008145.jpg

Regards Styria
 
Similar threads
Thread starter Title Forum Replies Date
Styria 2008 Bentley Brooklands Websites and Links 0
Oversize Unique Cars June 2008 Articles 1
B Team116 #2 cronicle 9th Oct 2008: hand cranked windows Motorsports 5
SELfor50 Wakefield Park 31/08/2008 - PHOTOS Motorsports 5
grant v Mercedes-Benz Club of South Africa - Concourse 28 Sept 2008 Talking Torque 12
SELfor50 Hillclimb - 17th August 2008 Pics Motorsports 10
Des 2008 Rolls-Royce Phantom Drophead Coupe Talking Torque 5
Des 2008 Collection Talking Torque 4
SELfor50 VIDEOS - Sandown 13th July 2008 Motorsports 9
SELfor50 Sandown RESULTS - 13th July 2008 Motorsports 9
s class Zwartkops 26 July 2008 Motorsports 18
B Team116 #2 cronicle 28th/29th June 2008: Sports Gauges Motorsports 10
B Team116 #2 cronicle 20th June 2008: window net Motorsports 2
B Team116 #2 cronicle 14th/15th June 2008: bonnet pins Motorsports 11
B Team116 #2 cronicle 25th-27th April 2008 - small annoying things Motorsports 17
B Team116 #2 cronicle 15-23rd March 2008 - Oel Search Motorsports 1
B Winton April 6, 2008 Motorsports 29
B Team116 #2 cronicle 30th March 2008 - Pedders coil springs Motorsports 13
SELfor50 Team116 - Car #1 [Hillclimb @ Faribairn Park Sutton 30/03/2008] Motorsports 18
SELfor50 Team116 #1 - Chronicle 28/03/2008 Motorsports 6
B Team116 #2 cronicle 26th March 2008 - big brakes for bad Mercs Motorsports 5
B Team116 #2 cronicle 20th/21st March 2008 Motorsports 11
Michel Mercedes-AMG Guarantees Maximum Safety at the 2008 Formula 1 Talking Torque 0
B Team116 #2 cronicle 9th March 2008 Motorsports 11
B Mine car at 2008 MBCV Concourse Talking Torque 6
Michel Mercedes-Benz at the 2008 Geneva Motor Show: Five New Model Highlights Talking Torque 0

Similar threads

Top