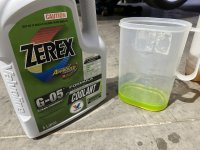
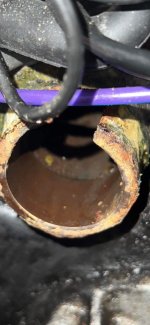
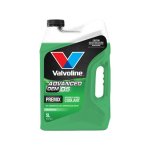
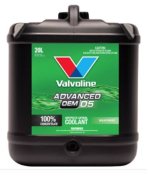
Cooling System Maintenance

More threads by Oversize

Oversize

Grand Master
Messages
5,753
Points
596
Location
Melbourne
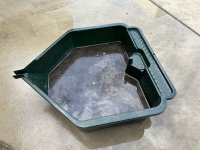
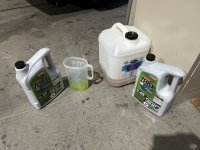
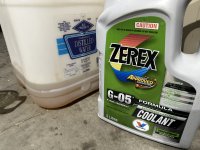
Pics to get things started before I start dumping copious amounts of text & pictures into this thread. I’ve been interested in coolant & cooling systems for years so it’s good to finally get my thoughts into words that can be shared to benefit everyone here.

IMG_5200.jpegIMG_5200.jpegIMG_5200.jpegIMG_5191.jpeg
 
OP
Oversize

Oversize

Grand Master
Messages
5,753
Points
596
Location
Melbourne
This is an article for ATB Magazine by MBCV which will be published in March 2024. For completeness, I'll add the coolant article after this one which is about cleaning:

Continuing on from my last very long article about coolant…. Coolant is so important because it acts as an anti-freeze and anti-boil, provides lubrication plus anti-cavitation and anti foaming properties and most importantly acts as a corrosion preventative. Fun facts include a freezing point of -36deg C and a boiling point of 162deg C (undiluted), or 107degC (50% V/V). It can be seen that a higher concentration of coolant will increase the boiling point, however most premixes (ready to use) are 50% V/V, which is the concentration recommended by many manufacturers. Pressurizing the cooling system with a 15PSI radiator cap increases the boiling point of the coolant an additional 25deg C.

Something interesting I picked up in the Owner’s Manual of a 450SEL. The red mark on the temperature gauge is apparently matched to the factory fill coolant mix (approx 45% V/V), which offers protection between -30deg C to 125deg C. So when the gauge hits the red mark the temperature is 125deg C. If no coolant is present in the cooling system, the water alone will boil at 118deg C (being pressurized to approx 14PSI), AND THE POINTER ON THE GAUGE MAY STILL BE BELOW THE RED MARK! Meaning you can cook your engine without the gauge indicating it’s too hot….

Another fun fact: On Earth we live in a pressurized atmosphere which is approx 14.7PSI above absolute zero pressure (ie a vacuum eg outer space). So we are all living under a 14.7PSI radiator cap (LOL)! Note that a 14 PSI radiator cap is actually 14.7PSI (atmospheric pressure) plus 14PSI (cap rating) equating to 28.7PSI above absolute zero pressure.

So coolant performs numerous critical roles in an engine, which highlights the fact it should be changed regularly and the task performed without taking shortcuts. It seems at some point the service interval for the factory or OEM coolant was extended from 2 years to every 3 years (Service Job 991). With the many steps involved and the challenges associated with used coolant disposal, it’s wise to leave it to a trusted professional unless you’re confident in your own abilities.

On cooling system maintenance, a few facts may be of interest and concern. Hard water, heat and time can combine to create calcium deposits and corrosion in the cooling system. Degraded coolant can contain various levels of dissolved solids including minerals like calcium carbonate, magnesium calcium carbonate, calcium sulphate, magnesium sulphate and sodium chloride. These minerals and rust are often referred to as ‘scale’. Scale can restrict a cooling system’s ability to transfer heat, resulting in elevated engine temperatures and overheating. Scale only one millimetre thick can reduce cooling system heat transfer by 30%. Hot spots in the block and head can cause engine detonation or pinging. It is for this reason I mix my own coolant and don’t like using tap water as the other part of my 50% solution, since tap water also contains minerals including fluoride.

A ‘fast flush’ with a cheap 300ml bottle of radiator flush will not remove what has built up over decades and thousands of kilometers. Most fast flushes contain acids, which will cause damage to copper, aluminium, brass, and zinc alloys. Warning signs of scale deposits include rust coloured material around the radiator cap, or an oily film floating on top of the coolant.

Whilst coolant also exhibits some cleaning properties, it does not replace the practice of the cleaning and de-scale processes below. Note these are separate tasks. In fact if you’ve ever blown a headgasket or two, or had a transmission cooler fail allowing oil to enter the cooling system, then these tasks may be mandatory (but seldom performed). Clear indicators of these conditions are overheating and emulsified oil in the coolant which resembles a chocolate milkshake!

If you’re comfortable performing the coolant flush as described in the last episode, you might consider trying your hand at properly cleaning the cooling system too! Considering the processes of these tasks, you could potentially save a lot through DIY since there’s quite a bit of labor (time) involved. Note that I have not performed the flowing tasks myself, so I cannot provide any direct report through experience on their hazards or benefits. Also note that cleaning should be conducted during the flushing stage and before you replace your coolant with fresh product. Some of the information provided here is from the MB Engine Service Manual (Job 20-015) and individual product guidelines. The guidelines below are for a 450 M117 with a cooling system capacity of 15L.


Maintaining the Cooling System

Cleaning

  • Drain the cooling system.
  • Remove the thermostat and refit the cover only.
  • Mix 1L Cooling System Cleaner to 15L tap water in a suitable 20L container. The cleaner recommended by the factory was ‘Henkel (brand) P3 Croni’ mixed in a ration of 5% (50g/L) equating to 750g in a 450 with a system capacity of 15L. Obviously was supplied in powder form. This product and the other one recommended are neutral to mildly alkaline and safe for use with aluminum radiators. Unfortunately they are both NLA and I cannot find any information on their formulation. After extensive research I have found another product designed for the same job on truck (diesel) engines and recommended by Cummins. It is called ‘Fleetguard Restore Cooling System Cleaner’ (product code CC2610) which is supplied in a 3.78L container. Not to be confused with ‘Restore Plus’ which is acidic and designed for de-scaling. ‘Restore’ can be sourced from several places, but the most convenient in Victoria is ‘Adam’s Transport Equipment’, 1/485 Cooper St, Campbellfield 3061 Ph 93053455. It is currently on sale for $66. Do not swallow or inhale this product and handle it in a well ventilated area. My only concern with the product is it is designed for trucks and is alkaline based (it doesn’t state mildly alkaline), so I worry it may be too harsh for a passenger vehicle application. The ratio I recommended above does take that into consideration and is the most diluted solution recommended by the manufacturer. The ratio is also similar to the OEM product recommendations (750g/15L), despite the fact it was supplied in powder form.
  • Refill the cooling system with the premixed cleaner
  • Turn on the heater to max with the fan on low
  • Run engine at medium speed to 80deg C and hold it at this temperature for 5 minutes. Fleetguard recommends running the engine at normal operating temperature for 2 hours, so that’s quite a difference! I would suggest a compromise between the two with consideration given to Fleetguard’s original application being a truck. Perhaps 15-30mins would be sufficient time?
  • Stop the engine and let cool to 50deg C
  • Completely drain the cooling system
  • Immediately flush the cooling system with tap water (while the engine is idling) until all residue is removed.
 
OP
Oversize

Oversize

Grand Master
Messages
5,753
Points
596
Location
Melbourne
Removing Scale Deposits

  • Step 1 must be completed even if you think your system is free of oil etc
  • Completely drain the cooling system
  • Mix 1.5kg Citric Acid (10% or 100g/L) to 15L water in the empty 20L container used for the Cooling System Cleaner. I would suggest disposal of the container after use to avoid cross contamination. Citric Acid can be sourced in bulk ($11/kg) from ‘Nuts About Life’ Superhuman Food Store, 15 Hope St, Brunswick 3056, Ph 93808789, or 93376446.
  • Refill the cooling system with the premixed de-scaler
  • Turn on the heater to max with the fan on low
  • Run engine at medium speed to 80deg C and hold for 10 minutes
  • Stop engine and allow to cool to 50deg C
  • Completely drain the cooling system
  • Flush the cooling system with tap water 3 times or more (with the engine idling) and for at least 5 minutes during each flush
  • You may require additional treatments if you find this process has not been satisfactory
  • Refit or replace the thermostat with a new gasket
  • Refill with 50% approved coolant as per my last article.


Another company recommended by a mate in the chemical trade is ‘Liquid Intelligence’, Unit 8 / 12 Eddie Road, Minchinbury, NSW 2770 Ph 1800 441 163, or 02 8188 2060. They sell a product called ‘Cooling System Desludging Additive’ (product 238) which retails for $110.24 (1L) and treats up to 20L. This is not a de-scaling agent, but could be used instead of ‘Fleetguard Restore Cooling System Cleaner’ described in the Cleaning process.

‘Liquid Intelligence’ also sells another product called ‘Engine Cooling Systems Cleaner’ Part A and Part B (product 239), which is sold as a complete kit and retails for $172. This is clearly still a two step process, but avoids most of the concerns in getting the ratio of reactive agents vs water to the correct level for safe and effective use.

The premixed products from ‘Fleetguard’ and ‘Liquid Intelligence’ are certainly far more contemporary than citric acid, which has been around for generations. The newer products are likely to be more effective, less likely to cause damage and may even be safer to handle, with a bonus of being better for the environment.

Flushing whilst the engine is running is actually recommended by MB, however the task appears to be devoid of detail and doesn’t seem to describe the entire process. Simply leaving the bottom radiator hose disconnected and running tap water into the expansion tank would not effectively flush the whole cooling system and with water simply running in and straight out again it could even result in engine damage. I would suggest temporary removal of the engine fan. Direct mains pressure tap water into the top neck of the radiator. Use a rag or similar to provide a rudimentary seal between the hose nozzle and the radiator neck. Source and insert the largest diameter hose possible (and perhaps 1.5m in length) into the open end of the top radiator hose. Direct the open end of the 1.5m hose into the sewer if possible. Turn the hose on full and start the engine with the heater on max and the fan on low. Run the water and engine for about 5 minutes before stopping the engine and draining the cooling system completely. Repeat the process at least 3 times before sealing it up for normal operation and adding the coolant in the correct ratio.

So there you have it; everything you ever wanted to know (and some things you wish you didn’t) about coolant and your cooling system!
 
OP
Oversize

Oversize

Grand Master
Messages
5,753
Points
596
Location
Melbourne
I begin with a question; what is the THE MOST IMPORTANT FLUID that is critical to ensure the long life of our precious vehicles?? Brake fluid? No – this ensures we are safe and even if it deteriorates these smaller parts can easily be repaired / replaced. Engine oil? No – in a vehicle not driven daily it takes many, many years for engine oil to break down to a point where it can affect expensive components and longevity. The correct answer is an often neglected fluid called COOLANT.


I’m sad to report that both myself and a friend on the other side of the country in WA have experienced some rather negative outcomes regarding coolant and laid up vehicles. Even worse ,they both involved M100 powered vehicles. These cars were neglected by their previous owners but this applies to all vehicles incorporating alloy engine parts.


My old man once had a theory that if you don’t add coolant (just water when necessary), the engine is less likely to develop a leak! He’d only fix things when they invariably broke down, so I have several childhood memories of being stranded overnight in a dead car and miles from help! You might get away with it for a while in an old Ford or Holden but it’s definitely not a wise practice to adopt for a Mercedes Benz with tighter tolerances and a delicate mix of exotic materials!


Back in the late 80s service requirements dictated that coolant should be changed every 2 years. Today we have long life coolant (>5 years) which is likely to make owners more complacent, since it’s so long between changes. Extending the service life of some items can save some time and money in the long run, but it does make undertaking the task when due even more important. Missing this aspect of a major service could mean the coolant isn’t changed for 10 long years and that’s when huge problems can begin to surface. And here’s just a few examples:


My friend from WA bought a very sad W109 6.3 which would scare the living daylights out of anyone else but him, since he’s extremely capable of completing almost any major repair himself and to a very high standard. The car needed attention in all areas and he started with the huge task of removing the cylinder heads to investigate why the engine was seized, particularly since there was evidence of coolant in the cylinders. The coolant had completely degraded and turned to acid, thereby dissolving many critical areas, all the way through to the combustion chamber in at least one cylinder!


Not quite as extreme, but equally horrifying was my more recent experience with a 6.9. I purchased the vehicle from QLD and it was pretty neglected from a mechanical point of view. I had the impression that the owner left the maintenance up to his mechanic who was taking shortcuts and rendering the vehicle unsafe. About 6 months after taking delivery and retrieving it from paid storage in North Melbourne, I started to re-establish a maintenance schedule and assessment. I was pondering how to tackle changing the coolant and dealing with the resultant mess in the garage, when my relationship broke down and I had to move everything. Perhaps 12 months later, after a wash I popped the hood to have a quick look and noticed some white deposits around one of the alloy housings at the top and front of the engine. I thought to myself that doesn’t look great, but I’ll get to it later. And I did; around 5 years later!! Strange that I used to take pride in the process of changing brake fluid and coolant exactly when required, but perhaps I became exhausted at the mere thought of doing the tasks….


Thinking I’d just resume changing the coolant, I couldn’t remember if I’d partially drained the coolant (since the level was quite low), or if I’d touched it at all…. Something in my head said I should top it up and pressure test the system. It seemed to hold pressure ok, but there was water leaking from the top of the engine, towards the back. I thought that was an odd location and started poking around the spot with a screwdriver, when it effectively exploded in my face! I’d discovered there was a hole in the top of the inlet manifold and straight into the water jacket. I totally panicked thinking I had a dead engine and it was all my fault. If it had eaten through into the intake runners, I was in big trouble. I set to work and removed the manifold to discover the damage was isolated to the manifold and no other critical areas. I was fortunate to have another 6.9 from which I could source a replacement manifold; it always pays to have spares if you own a rare vehicle….


I tried to analyze how the corrosion could’ve developed in this way, since it seemed to be in an area that was actually above the coolant level. I’d removed the air filter assembly years before when I first started working on the car and couldn’t recall seeing evidence of corrosion, or an imminent failure. So it seems the corrosion occurred rapidly during my ownership. This would indicate that coolant can degrade at an alarming rate when it’s passed its use by date and suddenly begin to wreak havoc on the engine it was designed to protect.


I can’t remember where I sourced the photographs, but another person discovered corrosion in a set of M100 cylinder heads and spent a considerable about of money on labor to reverse the neglect. Understandable since I once priced a M100 cylinder head (when they were still available) and at $11,000ea I’d also repair the old ones! Of course water pumps can also be very expensive (if they are still available) and newer engines are almost entirely made from aluminum alloys including materials like ‘Alusil’, which makes it clear that coolant condition is of utmost importance. Signs of trouble include crystallized white coloured deposits and bulging hoses around hose clamps. Coolant in good condition tends to have a cleaning effect and will find the weakest link, so a minor leak makes itself known quickly.


Armed with the knowledge of at least three horror stories, you should know there’s a cure available: CHANGE YOUR COOLANT NOW if you’re not 100% sure when it was last done and done PROPERLY!! Coolant can be tested via its specific gravity with a special device, similar to testing the cells in a wet cell battery. However, I wouldn’t rely solely on this test or just add concentrated coolant if you discover it’s diluted. Follow the manufacturer’s maintenance schedule, do the job properly and relax for the next few years!


Look for genuine MB concentrate, OEM, or Valvoline Zerex G05 (for Mercedes Benz vehicles pre 2017). **Note Zerex had now been replaced with Valvoline Advanced OEM05**. Strangely, a Valvoline premix is available at Bunnings and Big W (more on premix a bit later)! Early MB and OEM coolant was a light yellow colour, but was updated to blue. The Valvoline coolant described above is green. At one point Totota coolant was red! Note that different coolant types must not be mixed together. If you decide to swap the coolant you’ve been using, or it is unknown what type is in your cooling system, then a full flush is required.


You can either buy a concentrate that you must mix up yourself (much like cordial), or buy a premix. Personally I recommend the concentrate. Check your owner’s manual, or on the web for your cooling system capacity. Make sure you buy a bit more than necessary, just in case you spill some, or have to top up later. Concentrate should be mixed 50/50 with distilled water. I prefer to buy distilled water in 10-20L containers and would highly recommend ‘BE Products’, 14 Clarice Road, Box Hill South, Ph 9001 7661, M-F. Distilled water is purer and therefore superior to demineralised water, which can still contain biological matter. Many premixes use demineralised water (including Valvoline). When mixing your own concentrate/distilled water, pour a single bottle of concentrate into a clean 20L container (suitably labeled) and then fill that now empty bottle with distilled water. Pour the bottle of distilled water (previously concentrate) into the 20L container. Do this with each bottle of concentrate until you have sufficient DIY premix. Do not completely fill the 20L container, since you may be unable to add a full bottle of distilled water and the mix will be too concentrated. Follow my method and you’ll always end up with a 50/50 DIY premix.
 
OP
Oversize

Oversize

Grand Master
Messages
5,753
Points
596
Location
Melbourne
So here's a process I've developed to change your coolant, which can be adapted to almost any vehicle. Follow this procedure on a COLD engine:

  • Place the vehicle on jack stands so it’s relatively level,
  • Remove the radiator cap,
  • Place a 15-20L container under the bottom radiator hose,
  • Loosen the top and bottom radiator hose clamps at the radiator,
  • Rotate slightly and pull the bottom hose from the radiator (stay clear of the draining coolant),
Note: Using only the drain plug on the radiator (if fitted) is not sufficient since it does not provide the water flow required for an effective flush.

  • Disconnect the top hose at the radiator in a similar way to the bottom hose,
  • Disconnect the heater hose at the heater tap (usually located at the back and top of the engine),
Note: Disconnecting both heater hoses is ideal, however access issues can make this too difficult or ineffective. Generally MB heater taps are open when the engine is off and there is no need to remove the thermostat using my method.

Remove the coolant drain plugs from the block (if fitted) and drain the old coolant into the waste container,

Note: If the drain plugs have never been touched, then it may be wise to leave this step until next time. They may be corroded into place and attempting to loosen them now could lead to drain plug damage where the only fix is engine removal!

  • Remove the waste container from under the car,
  • Put a large container (or several) under the radiator, expansion tank and back of the engine; otherwise you’re about to make a huge mess!
Note: I once cut down a 1000L plastic water tank for this purpose, but it did become rather hard to move when it was full of water! Don’t even bother trying an inflatable children’s wading pool; it won’t last long when you drag it across the garage floor!

  • Fit a high flow nozzle to a garden hose,
  • Blast mains pressure water into the radiator expansion tank, radiator top neck and heater hoses (in both directions) until the water comes out clean,
  • Reconnect the bottom radiator hose without tightening the clamp, just enough to hold water,
Note: if you push the hose on too far, you’ll be making the job more difficult since you’ll be removing and refitting it several times during this process.

  • Refit the block drain plugs only enough to stop water escaping,
  • Rapidly fill the cooling system with water via the expansion tank until water runs out the radiator top neck or heater hoses,
  • Disconnect the bottom hose and allow the water to rush out quickly (the large volume of water rushing out will eventually clean the insides nicely),
  • Repeat the process of refilling and draining as many times as necessary until the water comes out clean,
  • Alternate filling the system between the expansion tank, heater hoses and radiator top neck until clean water is consistently coming out the bottom hose,
Note: Compressed air can be introduced to the water flow (with care) if water pressure in your area is relatively low and your cooling system is in poor condition where mild blockages have been identified.

Direct the water in both directions; through the disconnected heater hose and through the heater tap,

Note: If you’ve managed to disconnect both heater hoses, then you can flush the heater core in both directions and also through the engine and out the bottom hose on both sides.

Continue flushing in both directions (where possible) until all debris is flushed out & only fresh water is visible.

Note: If you find there’s no water coming out from an area you’re trying to flush, you can block water leakage elsewhere with your hands (or other means) to force a backflow, or to increase the pressure where necessary. If there’s no flow no matter how hard you try, you may have a serious blockage which requires the removal of various components to rectify.

Remove the block drain plugs,

Note: Clean the threads with a wire wheel as necessary and replace them if badly corroded.

If you’re confident you can do so without damage, carefully use compressed air to blow out any remaining fresh water from the heater core,

Note: Not doing this step will mean the new coolant will be slightly diluted.

  • Refit the block drain plugs with new washers (do not over-tighten them),
  • Replace rubber hoses where necessary (unusually soft/hard, or damaged),
  • Replace all the hose clamps with ‘Wurth’ brand ‘Zebra’ type or similar design,
Note: Good quality hose clamps won't damage the hoses and will allow the clamp/hose to be removed and refitted many times if necessary in the future. I would definitely NOT recommend using any hose clamp with slots cut from the band, which will bite into the hose and affect its integrity.

  • Position the hose clamps for easy access and reconnect all the hoses,
  • Tighten the hose clamps using a Wurth hose clamp tool or 7mm socket on a 1/4” drive,
  • Decant some of your commercial or DIY premix into a 2L container (not a drink container) and using a funnel, refill the cooling system to a level half-way between minimum and maximum on the expansion tank,
  • Start the engine with the radiator cap removed, heater on hot and the heater fan on low,
  • Monitor the coolant level and top up when necessary using your premix,
  • Position the car on an exaggerated (but safe) incline with the radiator expansion tank as the highest point in the cooling system,
  • Continue to run the engine and monitor the coolant level until the engine reaches normal operating temperature,
  • Refit the radiator cap,
  • Test drive a short distance, while keeping an eye on the engine temperature,
  • Let the engine cool overnight and recheck the coolant level,
  • Relax for 2-5 years!!!


As you can see it’s an involved process if it’s to be done correctly. You can see why I was exhausted just thinking about it and I ended up doing this 4 times just before leaving the factory! It’s well worth paying an expert to do all this if you don’t feel confident to DIY!


You can complete an even more thorough flush using citric acid. This additional work may only be necessary if your cooling system is heavily contaminated with debris, rust or oil (heaven forbid). I have yet to try this process, so I cannot state if it’s worth the effort, effective, or even safe for you, your engine, or the environment.


So how can you dispose of the old coolant?? Not an easy answer so I’ve discovered… Coolant generally contains ethylene glycol which has anti freeze, anti boil and corrosion inhibitors. It is a poison, so it must be kept away from children and animals - DO NOT DRINK!! Unfortunately it has a sweet smell and taste which makes it even more dangerous. Some manufacturers are now using bittering agents or propylene glycol which is apparently not as toxic to animals/humans. Used and degraded coolant is even worse than new coolant since it may contain heavy metals such as lead and chromium and can become acidic under certain conditions. Do not store new or used coolant in drinking containers and make sure the containers used are clearly labeled and kept out of reach by little hands.


Some say you can discard coolant into the sewerage via the laundry trough, or directly into the sewer access opening in the back yard. This means it heads to the sewage treatment plant, instead of into the storm water, creeks, rivers and eventually untreated into the ocean... Definitely NOT the storm water drains or onto the ground. If it gets into ground water then it’s not good for the environment. Waste water used during the flushing process might be ok to discard on the lawn, but keep it away from fruit trees, vegetables, herbs and plants used for consumption.


Of course not everything you read on the web is true, however other properties of coolant I’ve discovered on the web include:


  • It will completely dissolve in water,
  • Has a low to moderate toxicity to aquatic life,
  • Ethylene glycol breaks down in air from 1.5 - 10 days and in water or soil in several days to a few weeks,
  • It is a common de-icing agent for airport runways (which runs off into storm water drains).


I’ve been told discarding coolant with waste oil (sump/engine/transmission/cooking oil) will contaminate the lot and it makes it unsuitable for recycling, but others say it’s ok depending upon the collection agency!


After additional research, the best I can recommend is to keep it separate, clearly label it and check out this website for a household waste collection near you. Search for the link, ‘Detox YourHome’:


www.sustainability.vic.gov.au


Note that the site specifically states they can collect waste coolant/antifreeze. Unfortunately individual collections are not very frequent, so you may have to store it for a while, or travel a greater distance if you wish to dispose of it quickly.
 
OP
Oversize

Oversize

Grand Master
Messages
5,753
Points
596
Location
Melbourne
Some examples of what coolant shouldn’t look like (black with oily film) and what your manifold neck shouldn’t look like (broken 6.9- not mine)! I had some Zerex stored for a long time & the NOS coolant in one of the containers turned out to be off-colour (yellow-ish), so I decided not to use it. I ended up rapid-flushing & changing the coolant on 4 cars just before I moved from the factory…. Whew!

IMG_4139.jpegIMG_0553.jpegIMG_0554.jpegIMG_0555.jpegIMG_1363.jpeg
 
OP
Oversize

Oversize

Grand Master
Messages
5,753
Points
596
Location
Melbourne
I believe Valvoline is far cheaper than OEM, but I’m liking the blue colour of OEM!

IMG_5301.jpegIMG_5302.jpeg
 

c107

and 111/116/124/126
Moderator
Messages
3,527
Points
760
Location
Sydney
Interesting you mentioend liquid intelligence. I've been thinking of trying this in my Citroen DS, which is a south Australian car originally so has a dirty cooling system. I normally flush it out every couple of years, but now i hear more about liquid intelligence, I may give it a go.
 
OP
Oversize

Oversize

Grand Master
Messages
5,753
Points
596
Location
Melbourne
It was recommended by a mate who’s a chemist and may even be a member here (with the ex-Victor Chang 6.9). He said it’s likely better than using citric acid.

Liquid Intelligence was first mention here a few years ago but no-one reported back with any results.
 

Similar threads

Top