WGB
New Member
My 6.9 has always had a weak right front strut although it never particularly leaked externally.
The struts are no longer procurable new but I purchased two kits of seals off US E-bay last year.
I also understand Styria sells reconditioned exchange struts and this was my next alternative - and looking back on my experience probably a sensible economical one as well.
I appreciate this is his business and have no desire to tread on his toes but here is a record of what I have been up to.
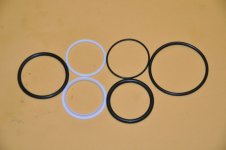
The individual measurements of the o rings and teflon seals are given in this posting
http://forum.w116.org/mechanicals/as-rare-as-rocking-horse-poo/msg90765/#msg90765]http://forum.w116.org/mechanicals/as-rare-as-rocking-horse-poo/msg90765/#msg90765
The previous owner had also fitted wider than normal 140 Eight slot wheels and these had rubbed the right front hydraulic hose but have held up over the four years I have had the car.
In-situ with frayed hose - I have a new pair of hoses for the fronts.
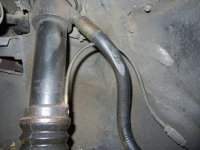
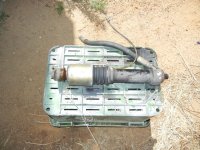
Strut removed and sitting in the open air after a de-grease
Bottom ball joint removed with a 22mm slim spanner
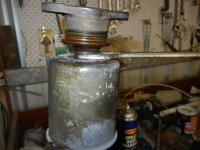
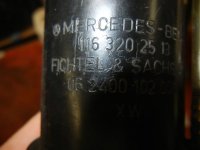
Markings on this strut before being attacked with a pipe spanner
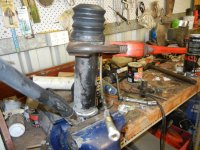
Top mounting clamped in vise and 18 inch pipe wrench attached to other cast end - unscrewed the top cover with some degree of difficulty
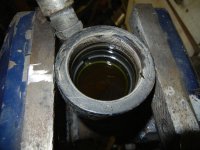
Here is a picture of the top cast cover still in the vise and showing the O ring in that cover
The next bit was the difficult bit strut reversed and bottom cast end clamped in vise ( with the piston removed through the top) using the bleed take-off point as a method of preventing it turning and after an hour of heaving with the pipe wrench I had only succeeded to turn the tube about 1 turn and then it was jammed even tighter and would not tighten or untighten.
Penetrating oil (probably irrelevant) - left overnight - and another 30 minutes heaving later not one skerrick of movement. At the point of "repair-despair" I remembered I had a 6 foot length of galvanised steel pipe which I placed over the end of the pipe wrench and with about 5 to 6 foot of leverage and my not insubstantial weight it started to give with a lot of graunches and moans.
They appear to use something like red-loctite to prevent the cylinder from turning and probably as an extra sealant and it is very effective and the reason it is so hard to undo. Once the threads are cleaned of the stuff the cylinder can be spun into the housings very freely by hand.
Here is the bottom teflon seal tensioned by the thick O ring in the cast end with with the bump stop - this is after the bleed off point so it is really the "seal of last resort".
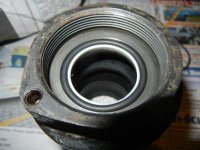
Here is the real shaft seal that is a push fit into the end of the cylinder and is held in place by the lower cap.
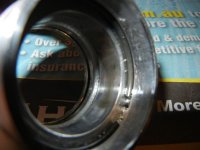
Here is a view of it from the lower side with a new seal and O ring fitted
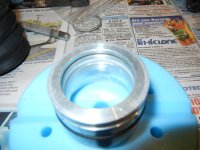
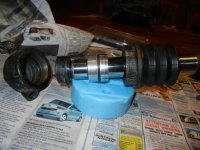
Here is the piston complete with piston ring surrounding the valving.
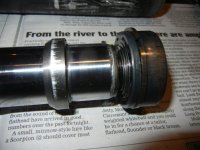
Here is a collection of the bits laid out - the cylinder has been reversed and should be the other way around.
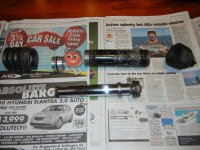
After a bit of overcomplicated stuffing around due to inexperience in the end the seal change is a walk in the park.
Lower cast end shaft seal (hat section teflon and fat o-ring) just pushes into the cast end by hand after removal of old seal
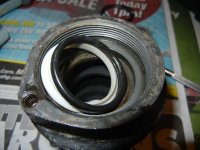
External O ring as well as old teflon seal and o-ring hidden under plain teflon seal are fished out with a small hook and replaced quite easily in the mainlower cylinder seal.
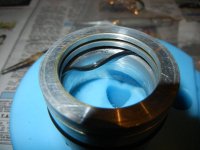
The new O ring is placed in the slot and then the teflon seal fed in over the top of it. The teflon seals against the shaft at the inner edge and the small o-ring on it's outer edge.
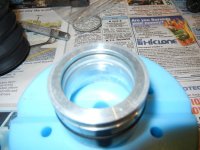
And of course a new O ring is placed in the upper cap
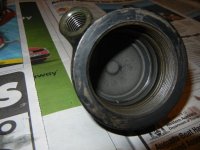
Here is a picture of the new parts waiting for "Cylinder rehabilitation" prior to assembly.
I am actually inclined to think that the poor performance of this strut has more to do with the glazing of the cylinder bore than the state of the seals . This picture shows the upper part of the bore which is quite matte in colour vs the very shiny lower bore.
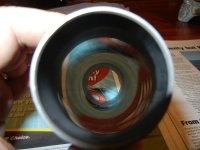
Opinions on how I should deglaze the bore are gratefully accepted.
Bill
The struts are no longer procurable new but I purchased two kits of seals off US E-bay last year.
I also understand Styria sells reconditioned exchange struts and this was my next alternative - and looking back on my experience probably a sensible economical one as well.
I appreciate this is his business and have no desire to tread on his toes but here is a record of what I have been up to.

The individual measurements of the o rings and teflon seals are given in this posting
http://forum.w116.org/mechanicals/as-rare-as-rocking-horse-poo/msg90765/#msg90765]http://forum.w116.org/mechanicals/as-rare-as-rocking-horse-poo/msg90765/#msg90765
The previous owner had also fitted wider than normal 140 Eight slot wheels and these had rubbed the right front hydraulic hose but have held up over the four years I have had the car.
In-situ with frayed hose - I have a new pair of hoses for the fronts.

Strut removed and sitting in the open air after a de-grease

Bottom ball joint removed with a 22mm slim spanner

Markings on this strut before being attacked with a pipe spanner

Top mounting clamped in vise and 18 inch pipe wrench attached to other cast end - unscrewed the top cover with some degree of difficulty

Here is a picture of the top cast cover still in the vise and showing the O ring in that cover

The next bit was the difficult bit strut reversed and bottom cast end clamped in vise ( with the piston removed through the top) using the bleed take-off point as a method of preventing it turning and after an hour of heaving with the pipe wrench I had only succeeded to turn the tube about 1 turn and then it was jammed even tighter and would not tighten or untighten.
Penetrating oil (probably irrelevant) - left overnight - and another 30 minutes heaving later not one skerrick of movement. At the point of "repair-despair" I remembered I had a 6 foot length of galvanised steel pipe which I placed over the end of the pipe wrench and with about 5 to 6 foot of leverage and my not insubstantial weight it started to give with a lot of graunches and moans.
They appear to use something like red-loctite to prevent the cylinder from turning and probably as an extra sealant and it is very effective and the reason it is so hard to undo. Once the threads are cleaned of the stuff the cylinder can be spun into the housings very freely by hand.
Here is the bottom teflon seal tensioned by the thick O ring in the cast end with with the bump stop - this is after the bleed off point so it is really the "seal of last resort".

Here is the real shaft seal that is a push fit into the end of the cylinder and is held in place by the lower cap.

Here is a view of it from the lower side with a new seal and O ring fitted

Here is the piston complete with piston ring surrounding the valving.

Here is a collection of the bits laid out - the cylinder has been reversed and should be the other way around.

After a bit of overcomplicated stuffing around due to inexperience in the end the seal change is a walk in the park.
Lower cast end shaft seal (hat section teflon and fat o-ring) just pushes into the cast end by hand after removal of old seal

External O ring as well as old teflon seal and o-ring hidden under plain teflon seal are fished out with a small hook and replaced quite easily in the mainlower cylinder seal.

The new O ring is placed in the slot and then the teflon seal fed in over the top of it. The teflon seals against the shaft at the inner edge and the small o-ring on it's outer edge.

And of course a new O ring is placed in the upper cap

Here is a picture of the new parts waiting for "Cylinder rehabilitation" prior to assembly.

I am actually inclined to think that the poor performance of this strut has more to do with the glazing of the cylinder bore than the state of the seals . This picture shows the upper part of the bore which is quite matte in colour vs the very shiny lower bore.

Opinions on how I should deglaze the bore are gratefully accepted.
Bill
