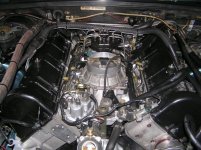
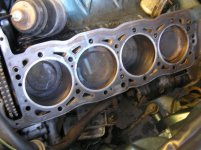
Continuation - grinding and de-coking !

More threads by Styria

Styria

The Godfather
Moderator
Messages
9,364
Points
492
Location
Sydney
Much time and agonizing has gone on since the heads and all the other ancillaries were removed from Gleaming Beauty.

I was fortunate in having the reconditioned heads on hand - they are in better condition than the ones removed especially in the water jackets area and general condition of "cleanliness". This option has certainly saved money that would have to be spent in order to service the heads removed, and it is my estimate that there would have been very little, if any, change out of a 'grand' - in other words, a thousand $'s. Sure it cost some three years ago, but that was then, and today the ball game is different.

I also decided to have the radiator serviced, but it had twelve blocked tubes and, according to the radiator guy, no amount of 'rodding' unblocked those tubes. The radiator was passed onto someone else for more extensive cleaning attempts, but due to careless handling etc. etc., a new core had to be made up. The cost of that was not budgeted for, but these things happen.

Whilst most components were removed from engine bay, I also decided to paint it in the 877 Petrol Blue, and that is a time consuming task. I am not happy with my efforts, but it is better than having the "Taxi White". Regards Styria
 
OP
Styria

Styria

The Godfather
Moderator
Messages
9,364
Points
492
Location
Sydney
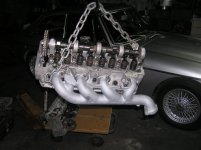
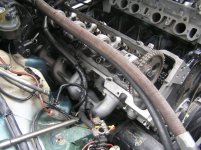
Okay, I thought I'd be smart with the re-assembly process. Reference has already been made by Mercules concerning removal of the right hand head and the exhaust manifold not clearing the steering box. Well, I really believed that the head and exhaust manifold could be re-installed as one unit with the help of the engine hoist, so I decided to go that route with both heads.

gearboxmodelnumbers411.jpg

Now, it should be remembered that removal and replacement procedures would vary in degree of difficulty and "PITA" experience between right hand and left hand drive on account of location of steering box, brake servo unit etc. So anyway, with some difficulty, I managed to locate the left hand head on the cylinder block. The long bolts proved extremely awkward to keep away from the gasket and cylinder bores, but I managed it. BTW, the abbreviation of PITA stands for 'pain in the arse". Also, in my view it is essential to coat the head gaskets with "Hylomar' to achieve perfect sealing properties once the engine heats up, and I also used the Loctite brand of flange sealant for the oil passages between heads and engine block and coated all bolts with LOctite 'anti seize' and a small amount of engine oil for lubrication purposes. Prior to placing heads on block, I had also cleaned and blown out all threaded bolt holes that hold the heads in place, Regards Styria
 
OP
Styria

Styria

The Godfather
Moderator
Messages
9,364
Points
492
Location
Sydney
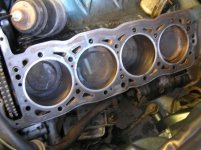
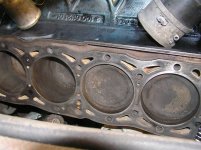
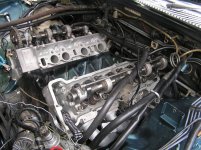
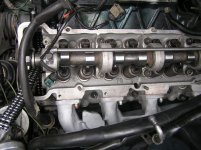
Okay, back again. Just made another coffee :D So, armed with my experience in dealing with the left head, I decided to put it to good use and tie the long bolts with plastic ties to prevent them from slipping past the head surface and constantly getting caught in the bores whilst you're moving the head into position. I also made sure that none of the pistons were at TDC in case any of the valves would touch the piston crowns when the heads were being torqued down.

gearboxmodelnumbers407.jpg/

gearboxmodelnumbers410.jpg

gearboxmodelnumbers409.jpg

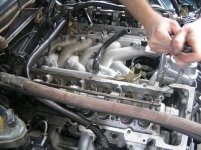
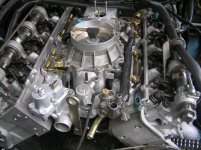
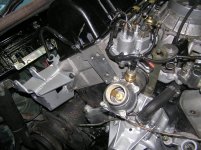
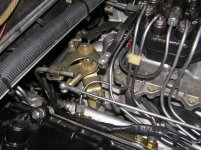
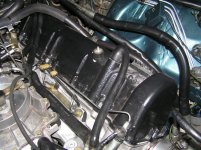
Now, by this time Mercules arrived and and I proudly offered the idea that, with the kind assistance of the engine lifting hoist, it should be possible to fit the right head with the exhaust manifold in place. He expressed his doubts, but was willing to try it. Well, it did not take long to realize that it just WILL NOT WORK. In the end, we had to separate the two, and we also did away with the hoist - it is easier by hand, but still a very tight fit. There are a few things that keep getting in the way, such as the main wiring loom on top of the engine etc. etc. So, now we are at the stage where heads are in place and properly torqued down, and trhe super duper looking inlet manifold is in place as well.

Copy2ofgearboxmodelnumbers416.jpg

Copyofgearboxmodelnumbers413.jpg

Copyofgearboxmodelnumbers414.jpg

Copyofgearboxmodelnumbers418.jpg

Copyofgearboxmodelnumbers419.jpg

So, things are slowly but surely falling into place and the next step will be to set up the valve timing and refitting timing chain, water pump and housing and some of the associated ancillary items. Regards Styria
 

s class

New Member
Messages
788
Points
0
Location
South Africa
Wow, wow and wow again. Your work looks fabulous.

I have a few quesitons :

a) why did you insert the long bolts thorugh the heads before putting them in position - is it not possible once the heads are in place?

b) how did you get the exhaust manifolds looking like that - looks really terrific.

c) This hylomar - does it have a long drying time? I imagine from the time you smear the gaskets, till you've wrestled everything into place might take some time.

d) Would you have done anything different next time - it seems to me it may have been worth the little bit of work to remove the brake M/C and booster.

e) piston crowns look good and clean - did you clean them up, or has the engine just been burning that well?

f) new injectors? They look great.

g) I see your heads have a '78' cast into the upper surface - must be the build year. Trusty rusty's have a '76' in that place.
 

Mercules

Spiltting lanes
Messages
192
Points
0
Location
Sydney, Australia
Wow, wow and wow again. Your work looks fabulous.

I have a few quesitons :

a) why did you insert the long bolts thorugh the heads before putting them in position - is it not possible once the heads are in place?

c) This hylomar - does it have a long drying time? I imagine from the time you smear the gaskets, till you've wrestled everything into place might take some time.

d) Would you have done anything different next time - it seems to me it may have been worth the little bit of work to remove the brake M/C and booster.

After several hours of sweat & swearing during the process of torquing these head on, i did not realise just how good that engine & manifold looks Mike - can't wait to hear it running :)

Des, the long head bolts sit under the cams and cannot be removed with the cams in place - Mike had all the lifter clearances done so it seemed easier to do it in situe rather than pull it apart unecissarily. Cable ties are man's best friend for this job!

Hylomar becomes touch dry in seconds (provided you don't apply it to heavily) but cures properly when the engine heats up.

It was only under protest from me that Mike did not remove the brake booster! I reckon the job would have taken about 30 mins less if the booster was not in the way but I hate to think about how long the removal/refit process would have taken. I am glad we didn't - may have taken about 10,000 socket & extension changes during the torquing procedure but its done and I am happy with the repair!
 

John S

New Member
Messages
636
Points
0
Location
Sydney
Styria, Cam - I almost hate to ask this question now, but I am rather curious about how difficult is is to set the timing now that both heads are on and the pistons were initially located midway down the bores so no valves will clash with them. Was it possible to adjust the cams very close to the correct settings once the first head was on, before installing the second head, or am I misunderstanding the mechanics of this?
 

Mercules

Spiltting lanes
Messages
192
Points
0
Location
Sydney, Australia
Hey JOhn!

I have never worked on one of these engine before so I couldn't tell you if there are any special tricks - seems to be relatively simple though :rolleyes:

With the engine turned back a few degrees, the highest piston will sit down far enough to clear the valves during head fitment. Once it is all strapped down, the crank can be moved back to TDC so the cams can be timed.


Not sure if that answers your question :confused:
 

SELfor50

New Member
Messages
1,198
Points
0
Location
Capitown
Sterling job you guys are doing / done there!! ;)

Love seeing a plan come together.

This may be a stupid question, but I don't suppose those exhaust manifolds would fit an M117? Possibility?
(They are different to 117 headers, aren't they?)
 
OP
Styria

Styria

The Godfather
Moderator
Messages
9,364
Points
492
Location
Sydney
Sterling job you guys are doing / done there!! ;)

Love seeing a plan come together.

This may be a stupid question, but I don't suppose those exhaust manifolds would fit an M117? Possibility?
(They are different to 117 headers, aren't they?)

Hi Cam2, the question is not stupid. It never hurts to ask. The obvious short answer is - no - they will not fit. Whilst outwardly looking similar (I think), 6.9 manifolds are bigger...and I would also add, not terribly efficient.

S-Class - As far as the exhaust manifolds are concerned, they were intially wire brushed with a wire wheel attached to a bench grinder, and after that I had them beadblasted by the radiator guy. I then sprayed them with a 1500 degree exhaust paint made by a company called VHT. This paint lasts very well but does not take kindly to petrol.

Would I have done anything differently ? The answer surprisingly is "No" - the only thing I really would like is a less hectic time schedule. Normally with a fairly major job like this which involves the dismantling of a number of components, it is best to attend to as many components as possible. That way, an 'old car' can be kept going without having to fix something new every time you look at the car.

The wisest move I made with this repair were the replacement heads. To have them on hand, all done and in perfect condition, saved any number of headaches. Time, money, convenience, you name them, and they are there. I could also consider doing this job with engine out, but then I would want to attend to the gearbox, starter motor etc. etc. and I would never have finished. Regards Styria
 
K

koan

Guest
Good on ya' for photo documenting all this styria, the pics and text will all be useful when I get round to my valve job, it's been six months since I discovered the low compression on #2 but other things seem to prevent me making a start.

Right head can obviously be removed with brake booster in place but what about the A/C line, does that have to come off?

My plan is to get the heads "tanked" to clean them up. I want to remove the valve gear, cams, adjusters and springs etc. (taking care to keep the valves up when engine turned) with heads in place, it seems easier to this on the car. Is this a bad idea?

koan
 

John S

New Member
Messages
636
Points
0
Location
Sydney
Styria, I just realised that the engine photos also show off your new engine bay colour scheme - it looks good!
 
OP
Styria

Styria

The Godfather
Moderator
Messages
9,364
Points
492
Location
Sydney
Slowly, but surely, things are going back together. I try and steal some time at all ungodly hours (when others are fast asleep or having a good relaxing time) and I am fairly pleased with the way things are looking. Just to give you guys a bit of an idea:

gearboxmodelnumbers439.jpg

I 2-pack sprayed the bracket on which the alternator is mounted in MB 518 Silver and Clear. Normally, they are black, but we had some silver left over and decided to use it rather than disposing of it. Incidentally, if ever at a future date I need to remove the timing chain tensioner, I will remove that bracket and alternator as it is so much easier to service the tensioner - so many times, I have heard of oil leaks from that area (on M100 site) when really it is all child's play with that bracket out of the way.There is also, of course, a right as well as a wrong way of re-fitting the tensioner.

I also fitted new fuel injectors on the right hand bank, as well as plated injector retainers.

gearboxmodelnumbers437.jpg

Furthermore, some three years ago when I had the heads serviced and reconditioned, I had other components plated and, additionally, the rocker covers were powder coated and I used new capped nuts to hold everyting in place.


gearboxmodelnumbers434.jpg

An overall view of the inlet manifold and rocker covers.

gearboxmodelnumbers433.jpg

Some further details to follow soon - as I get myself organized. Regards Styria
 

s class

New Member
Messages
788
Points
0
Location
South Africa
Looking very good! I can sympathise with how much work this must be.

Its interesting to me to look at the details. I see your new cap nuts are a silver colour. And the washers under them are gold colour.

I just had a whole lot of plating done, and examining my old cap nuts, I decided that they were once gold coloured - don't know if I'm right. The washers for the cap nuts were all missing - so I bought new ones at the dealership - and they are silver coloured - but this means nothing because with MB supercession, parts often change cosmetically over the years.

I second your recommendation to remove the alternator braket when dealing with the tensioner - that's what I did on the AMG, and it was quick, and I was able to easily install the tensioner with no leaks.
 

WGB

New Member
Messages
1,289
Points
0
Location
Perth Western Australia
I third your recommendation about the alternator bracket.

I removed my A6 with it in place but when it was out and I was about to put it back and start on the timing chain it was so easy to remove and opened up the right side of the engine to twice the effective space.

Anyway Styria - looks bloody fantastic!!!!!

Bill
 

John S

New Member
Messages
636
Points
0
Location
Sydney
With the heads torqued down and the cam covers on the timing chain must be on and the timing done, so I assume there was no problems lining everything up?
 

Michel

The Prince of Arabia
Moderator
Messages
10,016
Points
775
Location
Sydney, Australia
Well done Godfather....

I thought you would have painted the rocker covers the same colour as the GB....;)
 

Des

New Member
Messages
2,144
Points
0
Location
Australia
Great work there Styria,

looking at these pictures reminds me of how big these M100 motors really are. Always used to be amazed wen popping the bonnet on my 6.9 at how big the motors are, you would think an engine that size would be in a truck or a plane
:eek:

Remembering that even then you can't see it all, as the sump is off to the drivers side in the guard.


thanks for taking the time to share your handy work with us.
 
OP
Styria

Styria

The Godfather
Moderator
Messages
9,364
Points
492
Location
Sydney
Hi JohnS, yes, I did take the opportunity to paint as much of the engine bay in Petrol Blue whilst access was REASONABLY easy - to be frank, it's still a bugger of a job, especially as I did not spray, but used a paint brush. Coverage is quite "streaky" as the two pack does not seem to want to adhere to the old, existing paint. As I said, the finish is quite mediocre, but probably still better than what I had before.

Koan - thanks for your response and I apologize for not replying sooner. I am not sure what you mean by 'tanking' but assume that you would place the heads in some form of mild alloy cleaning acid bath (note alloy cleaning). Am I right in assuming this ?

Now, if you look carefully at the crankshaft position in one of the two threads I commenced on this job (JohnS-your info as well), you will note that in the shown position of the crankshaft there is no chance of any of the valves touching any of the pistons. It then becomes a relatively simple matter to time one cam at a time and fit the chain to the chain wheel. BTW, the chain had been replaced some three years ago and exhibited just moderate stretch - not enough to consider fitment of another chain.

Thanks Michel - I went one better. When I was brush painting the engine bay with the container resting in the valley of the 'mighty 6.9' :D (anybody like this ?), the jolly thing tipped over on me so, as a consequence, I have an engine valley in MB 877 metallic Petrol Blue and a few choice swear words thrown in for good measure. No photos available unless you look closely. Regards Styria
 
R

Ron B.

Guest
Regarding cleaning heads,today the busiest engine rebuilders use ultrasonic machines which use water to clean the carbon a grease from alloy engine components. ( something I found out after Sclass mentioned it on the M-100 site) .
Cleanliness is next to happiness when doing engine work.
Is your engine is a Australian delivered one? It has the low comp. dish pistons and I think only Australia and The USA got those.
All the German and English delivered ones I have worked on have flat top pistons.
It doesn't help that Daimler has very little info on what pistons were fitted to what engines.
gearboxmodelnumbers407.jpg

I have always fitted the heads to any mercedes engine at #1 TDC with the cam(s) on the mark. There is no danger of connecting the pistons with the valves .
Also,removing the master cylinder is only a few minutes work, and a good excuse to clean up the booster . Also ,while the heads are off it's the best time to overhaul the sway bar bushes. These are really important as worn bushes actually affect the cars ride height,often making the front sit high. They only fit one way too.
Another oppurtunity presented is the suspension oil feed line ,these are nearly always rotten and leaking and it only take a few minutes to fit a new one.
As mentioned in the other thread engine mounts can be got at easily .Use 6.9 mounts,NOT 280SE mounts..even if they are cheaper.
Styria,did you remove the oil tank ? it's a good idea to drop it and get it flushed. It always surprises me to see the amount of sludge in them. :)
 
Top